Deploying with Jenkins Publish Over SSH Plugin
TweetPosted on Friday Feb 28, 2014 at 09:28AM in Jenkins
Environment
- WildFly 8.0.0.Final
- Publish Over SSH Plugin 1.11
- Jenkins 1.551
- OS X 10.9.2
Requirements
- Resources are available in git repository
- The job is parametarized and can specify the tag to be processed
- The job will build a WAR and deploy it to the remote application server through ssh
Install the plugin
- Install “Publish Over SSH Plugin 1.11” at Plug-in page.
Create a key-pair
kyle-no-MacBook:~ jenkins$ whoami
jenkins
kyle-no-MacBook:~ jenkins$ ssh-keygen
Generating public/private rsa key pair.
Enter file in which to save the key (/Users/Shared/Jenkins/.ssh/id_rsa):
Created directory '/Users/Shared/Jenkins/.ssh'.
Enter passphrase (empty for no passphrase):
Enter same passphrase again:
Your identification has been saved in /Users/Shared/Jenkins/.ssh/id_rsa.
Your public key has been saved in /Users/Shared/Jenkins/.ssh/id_rsa.pub.
The key fingerprint is:
[...]
The key's randomart image is:
[...]
kyle-no-MacBook:~ jenkins$ ls -l .ssh
total 16
-rw-------  1 jenkins  jenkins  1679 Feb 28 11:55 id_rsa
-rw-r--r--  1 jenkins  jenkins   411 Feb 28 11:55 id_rsa.pub
kyle-no-MacBook:~ jenkins$
Put the public-key to the server
kyle-osxserver:.ssh kyle$ cat >> authorized_keys << EOF
> ssh-rsa [...] jenkins@kyle-no-MacBook.local
> EOF
Configure
- Click “Manage Jenkins”
- Click “Configure System”
- Go to “Publish over SSH” section
- Enter “/Users/Shared/Jenkins/.ssh/id_rsa” to “Path to Key”
- Click “Add” at “SSH Servers”
- Enter any logical name to “Name”
- Enter IP Address or Hostname of the server to “Hostname”
- Enter the user name to login to “Username”
- Enter any directory to “Remote Directory”
- Click “Test Configuration”
- Click “Save” at bottom of the page

Create a job
- Create or copy a job that can build the WAR correctly.
- As I wrote in How to specify a Git tag to be processed, make a job to can specify a tag to be processed.
- Click “Add post-build action”
- Click “Send build artifacts over SSH”
- Enter “Source files”
- Enter “Remove prefix”
- Enter “Exec command”

WildFly deploy command example:
/Users/kyle/wildfly-8.0.0.Final/bin/jboss-cli.sh --connect --controller=localhost:49990 --command="deploy hoge-0.0.1-SNAPSHOT.war --force"
Create a tag
kyle-no-MacBook:stock kyle$ git tag v0.1
kyle-no-MacBook:stock kyle$ git tag
v0.1
kyle-no-MacBook:stock kyle$ git show v0.1
commit 87a93c8039bd77b8eb8cbf8fbb522705c6451f1e
[...]
Run
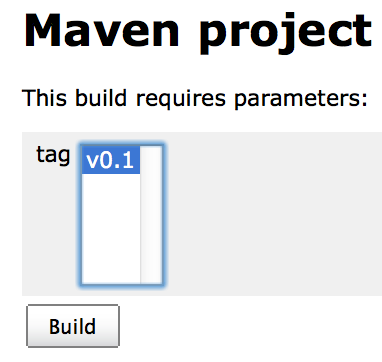
Run the job that created with the parameter of name of tag.
Click “Build with Parameters”

Select a tag to be processed and Click “Build”

Log
...
[JENKINS] Archiving /Users/Shared/Jenkins/Home/jobs/HogeDeploy/workspace/hoge/pom.xml to org.nailedtothex/hoge/0.0.1-SNAPSHOT/hoge-0.0.1-SNAPSHOT.pom
[JENKINS] Archiving /Users/Shared/Jenkins/Home/jobs/HogeDeploy/workspace/hoge/target/hoge-0.0.1-SNAPSHOT.war to org.nailedtothex/hoge/0.0.1-SNAPSHOT/hoge-0.0.1-SNAPSHOT.war
channel stopped
SSH: Connecting from host [kyle-no-MacBook.local]
SSH: Connecting with configuration [osxserver] ...
SSH: EXEC: STDOUT/STDERR from command [/Users/kyle/wildfly-8.0.0.Final/bin/jboss-cli.sh --connect --controller=localhost:49990 --command="deploy /Users/kyle/hoge-0.0.1-SNAPSHOT.war --force"] ...
SSH: EXEC: completed after 4,357 ms
SSH: Disconnecting configuration [osxserver] ...
SSH: Transferred 1 file(s)
Email was triggered for: Always
Sending email for trigger: Always
Sending email to: kyle@example.com
Finished: SUCCESS
References
Tags: jenkins
can pls tell me the how to deploy the php applications by using SSH plugin in jenkins CI...I was configured but what are the credintials we need to give the in build envoronment
Posted by Nagendra on July 19, 2018 at 10:41 PM JST #