PNotifyで遊ぶ
TweetPosted on Friday Jan 24, 2014 at 05:28PM in Technology
Macの通知ウインドウ的な表示が出来るPNotifyを使ってみます
環境
- pnotify-1.2.2.zip
- Firefox 26.0
- OS X 10.9.1
準備
とりあえず[1]からzipファイルを落としてきます。他の依存ライブラリはCDNのを使います
ファイルの置き方
ローカルに置くのはこんなものです。css2つと、jsファイルはzipファイルに入ってます

pnotify.html
<!DOCTYPE HTML>
<html>
<head>
<script src="http://ajax.googleapis.com/ajax/libs/jquery/1.7.2/jquery.min.js"></script>
<script src="http://ajax.googleapis.com/ajax/libs/jqueryui/1.8.19/jquery-ui.min.js"></script>
<link rel="stylesheet" href="http://ajax.googleapis.com/ajax/libs/jqueryui/1.8.19/themes/redmond/jquery-ui.css">
<script src="http://ajax.googleapis.com/ajax/libs/jqueryui/1.8.19/i18n/jquery-ui-i18n.min.js"></script>
<script type="text/javascript" src="jquery.pnotify.js"></script>
<link href="jquery.pnotify.default.css" media="all" rel="stylesheet" type="text/css" />
<link href="jquery.pnotify.default.icons.css" media="all" rel="stylesheet" type="text/css" />
<meta charset="utf-8">
<title></title>
</head>
<body>
<script type="text/javascript">
$.pnotify.defaults.styling = "jqueryui";
$(function(){
    $.pnotify({
        title: 'Regular Notice',
        text: 'Check me out! I\'m a notice.'
    });
});
</script>
</body>
</html>
動かしてみる
全くカスタマイズもしてませんが一応出ました。結構長い間出っぱです。

ポインタを窓の上に持っていくとボタンが出ます

右上に出ている水色の物体にポインタを持っていくと過去表示した通知を再表示できたりするようです。字がはみ出てるのがちょっと嫌な感じ。

イベントに連動させてみる
ベタですがボタン押したら出るようにしてみましょう
pnotify.html
<!DOCTYPE HTML>
<html>
<head>
<script src="http://ajax.googleapis.com/ajax/libs/jquery/1.7.2/jquery.min.js"></script>
<script src="http://ajax.googleapis.com/ajax/libs/jqueryui/1.8.19/jquery-ui.min.js"></script>
<link rel="stylesheet" href="http://ajax.googleapis.com/ajax/libs/jqueryui/1.8.19/themes/redmond/jquery-ui.css">
<script src="http://ajax.googleapis.com/ajax/libs/jqueryui/1.8.19/i18n/jquery-ui-i18n.min.js"></script>
<script type="text/javascript" src="jquery.pnotify.js"></script>
<link href="jquery.pnotify.default.css" media="all" rel="stylesheet" type="text/css" />
<link href="jquery.pnotify.default.icons.css" media="all" rel="stylesheet" type="text/css" />
<meta charset="utf-8">
<title></title>
</head>
<body>
<script type="text/javascript">
$.pnotify.defaults.styling = "jqueryui";

function pnotifyShow(){
    $(function(){
        $.pnotify({
            title: 'Regular Notice',
            text: 'Check me out! I\'m a notice.'
        });
    });
}
</script>
</body>

<button id="btn" onclick="pnotifyShow()">pnotify</button>

</html>
動かしてみる
ボタン押します

表示されます

まあ普通ですね。
カスタマイズしてみる
表示される時間を変えてみる
これで1秒になります
$.pnotify.defaults.delay = 1000;
全体はこうなる
<!DOCTYPE HTML>
<html>
<head>
<script src="http://ajax.googleapis.com/ajax/libs/jquery/1.7.2/jquery.min.js"></script>
<script src="http://ajax.googleapis.com/ajax/libs/jqueryui/1.8.19/jquery-ui.min.js"></script>
<link rel="stylesheet" href="http://ajax.googleapis.com/ajax/libs/jqueryui/1.8.19/themes/redmond/jquery-ui.css">
<script src="http://ajax.googleapis.com/ajax/libs/jqueryui/1.8.19/i18n/jquery-ui-i18n.min.js"></script>
<script type="text/javascript" src="jquery.pnotify.js"></script>
<link href="jquery.pnotify.default.css" media="all" rel="stylesheet" type="text/css" />
<link href="jquery.pnotify.default.icons.css" media="all" rel="stylesheet" type="text/css" />
<meta charset="utf-8">
<title></title>

</head>
<body>
<script type="text/javascript">
$.pnotify.defaults.styling = "jqueryui";
$.pnotify.defaults.delay = 1000;

function pnotifyShow(){
    $(function(){
        $.pnotify({
            title: 'Regular Notice',
            text: 'Check me out! I\'m a notice.'
        });
    });
}
</script>
</body>

<button id="btn" onclick="pnotifyShow()">pnotify</button>

</html>
その他
背景色の変え方がよくわからない…。CSSのセレクタが不明なんだがうまく調べる方法ないかなあ。jQuery UI側の設定を変えないといけないんだろうか。[1]のページ下部にはものすごい量のサンプルがあるのでそのうちまた調べてみる
参考文献
Tags: web
Arquillianチュートリアルを埋め込みWeldでテスト走らせるところまでやってみる
TweetPosted on Friday Jan 24, 2014 at 05:02PM in Technology
JavaEEで結合テストを楽にするツール/フレームワークのArquillianを使ってみます。基本的にはオフィシャルのチュートリアル[2][4]をなぞるだけです。ここでは埋め込みWeld使ったテストが緑色になるところまでやります。
環境
- Eclipse Kepler SR1
- Apache Maven 2.2.1 (r801777; 2009-08-07 04:16:01+0900)
- Apple JDK6u65
- OS X 10.9.1
準備
プロジェクトを作る
kyle-no-MacBook:arquillian kyle$ mvn archetype:generate -DarchetypeGroupId=net.avh4.mvn.archetype -DarchetypeArtifactId=java-1.6-archetype
Picked up _JAVA_OPTIONS: -Dfile.encoding=UTF-8
[INFO] Scanning for projects...
[INFO] Searching repository for plugin with prefix: 'archetype'.
[INFO] ------------------------------------------------------------------------
[INFO] Building Maven Default Project
[INFO]    task-segment: [archetype:generate] (aggregator-style)
[INFO] ------------------------------------------------------------------------
[INFO] Preparing archetype:generate
[INFO] No goals needed for project - skipping
[INFO] [archetype:generate {execution: default-cli}]
[INFO] Generating project in Interactive mode
[INFO] Archetype [net.avh4.mvn.archetype:java-1.6-archetype:0.0.3] found in catalog remote
Define value for property 'groupId': : org.arquillian.example
Define value for property 'artifactId': : arquillian-tutorial
Define value for property 'version': 1.0-SNAPSHOT:
Define value for property 'package': org.arquillian.example:
Confirm properties configuration:
groupId: org.arquillian.example
artifactId: arquillian-tutorial
version: 1.0-SNAPSHOT
package: org.arquillian.example
Y:
[INFO] ----------------------------------------------------------------------------
[INFO] Using following parameters for creating project from Archetype: java-1.6-archetype:0.0.3
[INFO] ----------------------------------------------------------------------------
[INFO] Parameter: groupId, Value: org.arquillian.example
[INFO] Parameter: artifactId, Value: arquillian-tutorial
[INFO] Parameter: version, Value: 1.0-SNAPSHOT
[INFO] Parameter: package, Value: org.arquillian.example
[INFO] Parameter: packageInPathFormat, Value: org/arquillian/example
[INFO] Parameter: package, Value: org.arquillian.example
[INFO] Parameter: version, Value: 1.0-SNAPSHOT
[INFO] Parameter: groupId, Value: org.arquillian.example
[INFO] Parameter: artifactId, Value: arquillian-tutorial
[INFO] project created from Archetype in dir: /Users/kyle/tmp/arquillian/arquillian-tutorial
[INFO] ------------------------------------------------------------------------
[INFO] BUILD SUCCESSFUL
[INFO] ------------------------------------------------------------------------
[INFO] Total time: 25 seconds
[INFO] Finished at: Fri Jan 24 20:48:27 JST 2014
[INFO] Final Memory: 23M/310M
[INFO] ------------------------------------------------------------------------
kyle-no-MacBook:arquillian kyle$
プロジェクトが出来ました
kyle-no-MacBook:arquillian kyle$ ls -l
total 0
drwxr-xr-x+ 8 kyle  staff  272  1 24 20:48 arquillian-tutorial
kyle-no-MacBook:arquillian kyle$
pom.xmlを書き換える
JavaEE6用の依存性を追加します。結果以下のように。本当はJavaEE7でやりたいのですが何かとらぶるのもいやなのでとりあえずチュートリアル通りに。
<?xml version="1.0" encoding="UTF-8"?>
<project xmlns="http://maven.apache.org/POM/4.0.0" xmlns:xsi="http://www.w3.org/2001/XMLSchema-instance" xsi:schemaLocation="http://maven.apache.org/POM/4.0.0 http://maven.apache.org/xsd/maven-4.0.0.xsd">
  <modelVersion>4.0.0</modelVersion>

  <groupId>org.arquillian.example</groupId>
  <artifactId>arquillian-tutorial</artifactId>
  <version>1.0-SNAPSHOT</version>
  <packaging>jar</packaging>

  <name>arquillian-tutorial</name>
  <url>http://maven.apache.org</url>

  <properties>
    <project.build.sourceEncoding>UTF-8</project.build.sourceEncoding>
  </properties>

  <build>
    <plugins>
      <plugin>
        <groupId>org.apache.maven.plugins</groupId>
        <artifactId>maven-compiler-plugin</artifactId>
        <version>2.3.2</version>
        <configuration>
          <source>1.6</source>
          <target>1.6</target>
        </configuration>
      </plugin>
    </plugins>
  </build>
  <dependencies>
    <dependency>
      <groupId>junit</groupId>
      <artifactId>junit</artifactId>
      <version>4.8.1</version>
      <scope>test</scope>
    </dependency>
    <dependency>
      <groupId>org.mockito</groupId>
      <artifactId>mockito-all</artifactId>
      <version>1.8.5</version>
      <scope>test</scope>
    </dependency>
    <dependency>
      <groupId>org.hamcrest</groupId>
      <artifactId>hamcrest-integration</artifactId>
      <version>1.2.1</version>
    </dependency>
    <dependency>
      <groupId>net.avh4.util</groupId>
      <artifactId>imagecomparison</artifactId>
      <version>0.0.2</version>
      <scope>test</scope>
    </dependency>
    <!-- clip -->
    <dependency>
        <groupId>org.jboss.spec</groupId>
        <artifactId>jboss-javaee-6.0</artifactId>
        <version>1.0.0.Final</version>
        <type>pom</type>
        <scope>provided</scope>
    </dependency>
    <!-- clip -->
  </dependencies>
</project>
Eclipseで開く
FileからImportを開く

Existing Maven Projectsを選択

作ったプロジェクトのディレクトリを選択してFinish

特にエラーもなくプロジェクトができました
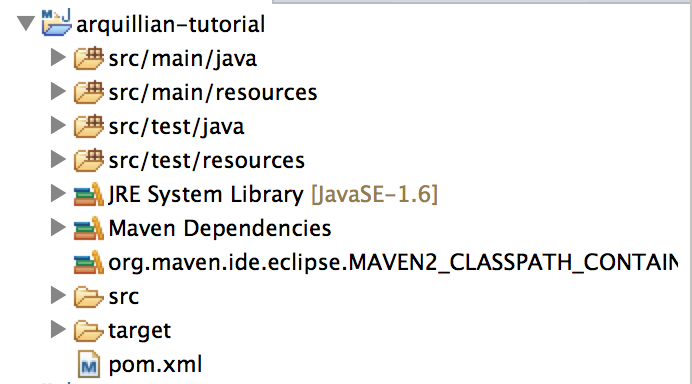 Java6が探し出されてしまったのがアレですがとりあえず我慢
pom.xmlを編集する
Maven Surefire Pluginはオプションだけど入れとくのをお勧めするとか書いてあるので、とりあえずこれも追加。動かすコンテナはとりあえずWeld EE Embeddedになっている。最終的にはスタンドアロンで動いてるWildFlyにしたいんだけどまあとりあえず。結果こうなる。
<?xml version="1.0" encoding="UTF-8"?>
<project xmlns="http://maven.apache.org/POM/4.0.0" xmlns:xsi="http://www.w3.org/2001/XMLSchema-instance" xsi:schemaLocation="http://maven.apache.org/POM/4.0.0 http://maven.apache.org/xsd/maven-4.0.0.xsd">
  <modelVersion>4.0.0</modelVersion>

  <groupId>org.arquillian.example</groupId>
  <artifactId>arquillian-tutorial</artifactId>
  <version>1.0-SNAPSHOT</version>
  <packaging>jar</packaging>

  <name>arquillian-tutorial</name>
  <url>http://maven.apache.org</url>

  <properties>
    <project.build.sourceEncoding>UTF-8</project.build.sourceEncoding>
  </properties>

    <dependencyManagement>
        <dependencies>
            <dependency>
                <groupId>org.jboss.arquillian</groupId>
                <artifactId>arquillian-bom</artifactId>
                <version>1.1.2.Final</version>
                <scope>import</scope>
                <type>pom</type>
            </dependency>
        </dependencies>
    </dependencyManagement>

  <build>
    <plugins>
      <plugin>
        <groupId>org.apache.maven.plugins</groupId>
        <artifactId>maven-compiler-plugin</artifactId>
        <version>2.3.2</version>
        <configuration>
          <source>1.6</source>
          <target>1.6</target>
        </configuration>
      </plugin>
      <plugin>
        <artifactId>maven-surefire-plugin</artifactId>
        <version>2.12</version>
      </plugin>
    </plugins>
  </build>
  <dependencies>
    <dependency>
      <groupId>junit</groupId>
      <artifactId>junit</artifactId>
      <version>4.8.1</version>
      <scope>test</scope>
    </dependency>
    <dependency>
      <groupId>org.mockito</groupId>
      <artifactId>mockito-all</artifactId>
      <version>1.8.5</version>
      <scope>test</scope>
    </dependency>
    <dependency>
      <groupId>org.hamcrest</groupId>
      <artifactId>hamcrest-integration</artifactId>
      <version>1.2.1</version>
    </dependency>
    <dependency>
      <groupId>net.avh4.util</groupId>
      <artifactId>imagecomparison</artifactId>
      <version>0.0.2</version>
      <scope>test</scope>
    </dependency>
    <!-- clip -->
    <dependency>
        <groupId>org.jboss.spec</groupId>
        <artifactId>jboss-javaee-6.0</artifactId>
        <version>1.0.0.Final</version>
        <type>pom</type>
        <scope>provided</scope>
    </dependency>
    <!-- clip -->
    <dependency>
        <groupId>org.jboss.arquillian.junit</groupId>
        <artifactId>arquillian-junit-container</artifactId>
        <scope>test</scope>
    </dependency>

    <!-- for weld ee embedded start -->
    <dependency>
        <groupId>org.jboss.arquillian.container</groupId>
        <artifactId>arquillian-weld-ee-embedded-1.1</artifactId>
        <version>1.0.0.CR3</version>
        <scope>test</scope>
    </dependency>
    <dependency>
        <groupId>org.jboss.weld</groupId>
        <artifactId>weld-core</artifactId>
        <version>1.1.5.Final</version>
        <scope>test</scope>
    </dependency>
    <dependency>
        <groupId>org.slf4j</groupId>
        <artifactId>slf4j-simple</artifactId>
        <version>1.6.4</version>
        <scope>test</scope>
    </dependency>
    <!-- for weld ee embedded end -->
  </dependencies>
</project>
クラスを作る
package org.arquillian.example;

import java.io.PrintStream;

/**
 * A component for creating personal greetings.
 */
public class Greeter {
    public void greet(PrintStream to, String name) {
        to.println(createGreeting(name));
    }

    public String createGreeting(String name) {
        return "Hello, " + name + "!";
    }
}
テストクラスを作る
package org.arquillian.example;

import javax.inject.Inject;
import org.jboss.arquillian.container.test.api.Deployment;
import org.jboss.arquillian.junit.Arquillian;
import org.jboss.shrinkwrap.api.ShrinkWrap;
import org.jboss.shrinkwrap.api.asset.EmptyAsset;
import org.jboss.shrinkwrap.api.spec.JavaArchive;
import org.junit.Test;
import org.junit.Assert;
import org.junit.runner.RunWith;

@RunWith(Arquillian.class)
public class GreeterTest {

    @Deployment
    public static JavaArchive createDeployment() {
        return ShrinkWrap.create(JavaArchive.class)
            .addClass(Greeter.class)
            .addAsManifestResource(EmptyAsset.INSTANCE, "beans.xml");
    }

    @Inject
    Greeter greeter;

    @Test
    public void should_create_greeting() {
        Assert.assertEquals("Hello, Earthling!",
            greeter.createGreeting("Earthling"));
        greeter.greet(System.out, "Earthling");
    }
}
クラスとテストクラスの配置
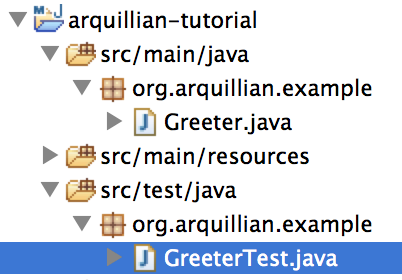
Maven Dependenciesの下にあるjarファイルを数えてみると72個あります。
テスト実行
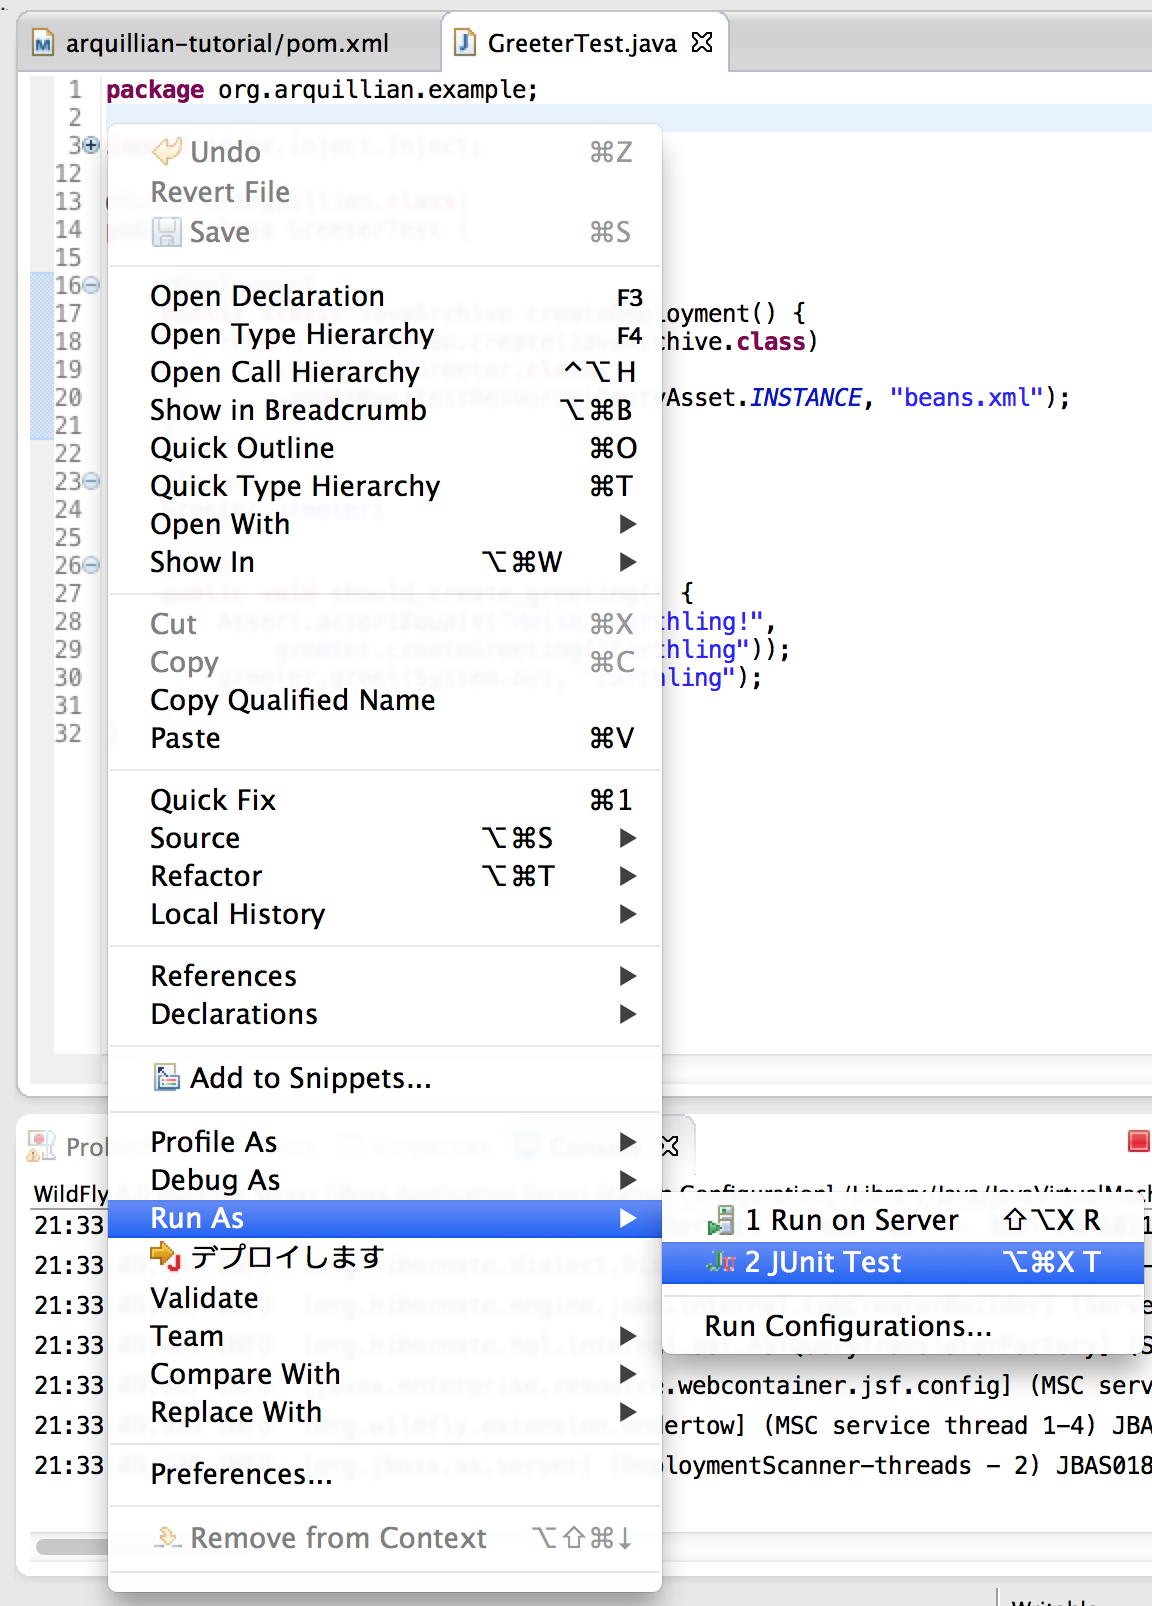
テストクラスのウインドウで右クリック、Run As→JUnit Test
コンソールへの出力

JUnit窓への出力

やっと@Inject使ったコードが動くとこまできました。準備は大変だったけど、埋め込みコンテナだけにテストの実行速度は普通のJavaクラスの単体テスト並の早さ。長くなったので続きは別の項で。
続き
Arquillianチュートリアルの埋め込みGlassFish3でテストを走らせるところをやってみる
参考文献
Tags: test
jQuery File Uploadとサーブレットでファイルアップロード画面を作ってみる
TweetPosted on Friday Jan 24, 2014 at 09:13AM in Technology
jQuery File UploadとJava Servletを使ってドラッグアンドドロップで複数ファイルのアップロードが可能な画面を作ってみます。
ここでは[1]を使います。[3]が参考になりそうです。サーバ側での受け取りはサーブレットを使います。Servlet3のAPIを使って作ります。
環境
- jQuery-File-Upload-9.5.3
- WildFly 8.0.0CR1
- Oracle JDK7u51
- OS X 10.9.1
準備
- [1]からzipファイルをダウンロードしてきます。私は9.5.3.zipというファイルを取ってきました
- この要領でEclipseでJavaEE7プロジェクトを作ります
作る
画面側でHTMLファイル以外に必要なもの
- jQuery本体
- js/jquery.fileupload.js
- js/jquery.iframe-transport.js
- js/vendor/jquery.ui.widget.js
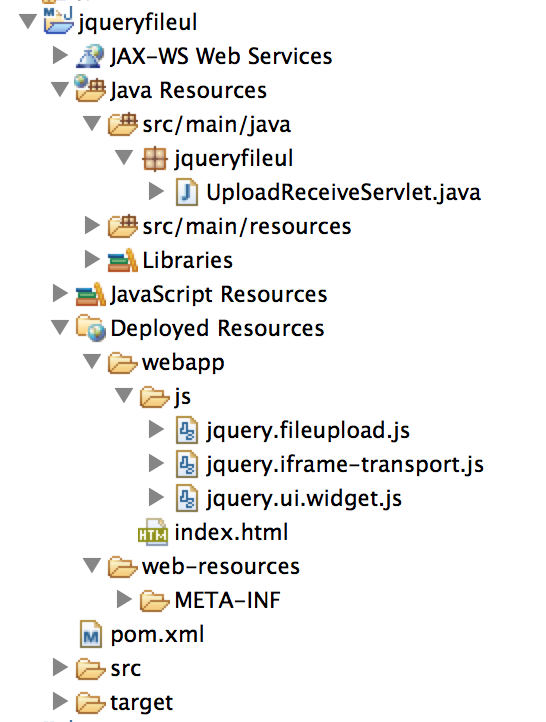
jQuery本体はCDNから取ってきます。下3つはjQuery-File-Uploadのzipファイルに含まれていますので適当な場所にコピーします。この例ではjsディレクトリを作ってそこにまとめて置きました。
プロジェクトの構造
こんな感じ
画面側
index.html
- 基本はファイル選択ボタンを押してファイルダイアログ出して選択
- 直接ブラウザの画面へドラッグアンドドロップも可
- 複数ファイルOK
- 簡単なプログレスバー的なものあり
<!DOCTYPE HTML>
<html>
<head>
<meta charset="utf-8">
<title>jQuery File Upload Example</title>
<style>
.bar {
    height: 18px;
    background: green;
}
</style>
</head>
<body>
<input id="fileupload" type="file" name="files[]" data-url="upload" multiple>
<div id="progress">
    <div class="bar" style="width: 0%;"></div>
</div>
<script src="//ajax.googleapis.com/ajax/libs/jquery/1.9.1/jquery.min.js"></script>
<script src="js/jquery.ui.widget.js"></script>
<script src="js/jquery.iframe-transport.js"></script>
<script src="js/jquery.fileupload.js"></script>
<script>
$('#fileupload').fileupload({
    progressall: function (e, data) {
        var progress = parseInt(data.loaded / data.total * 100, 10);
        $('#progress .bar').css(
            'width',
            progress + '%'
        );
    }
});
</script>
</body>
</html>
バックエンド側
UploadReceiveServlet
package jqueryfileul;

import java.io.BufferedReader;
import java.io.IOException;
import java.io.InputStream;
import java.io.InputStreamReader;

import javax.servlet.ServletException;
import javax.servlet.annotation.MultipartConfig;
import javax.servlet.annotation.WebServlet;
import javax.servlet.http.HttpServlet;
import javax.servlet.http.HttpServletRequest;
import javax.servlet.http.HttpServletResponse;
import javax.servlet.http.Part;

@WebServlet("/upload")
@MultipartConfig(fileSizeThreshold = 1024 * 1024, maxFileSize = 1024 * 1024 * 5, maxRequestSize = 1024 * 1024 * 5 * 5)
public class UploadReceiveServlet extends HttpServlet {
    private static final long serialVersionUID = 1L;

    @Override
    protected void doPost(HttpServletRequest request, HttpServletResponse response) throws ServletException,
            IOException {

        for (Part part : request.getParts()) {
            System.out.println(part.getName());
            System.out.println(part.getContentType());
            System.out.println(part.getSubmittedFileName());
            System.out.println(part.getSize());
            if ("text/plain".equals(part.getContentType())) {
                try (InputStream is = part.getInputStream();
                        InputStreamReader r = new InputStreamReader(is);
                        BufferedReader br = new BufferedReader(r)) {
                    System.out.println(br.readLine());
                }
            }
        }
    }
}
動かしてみる
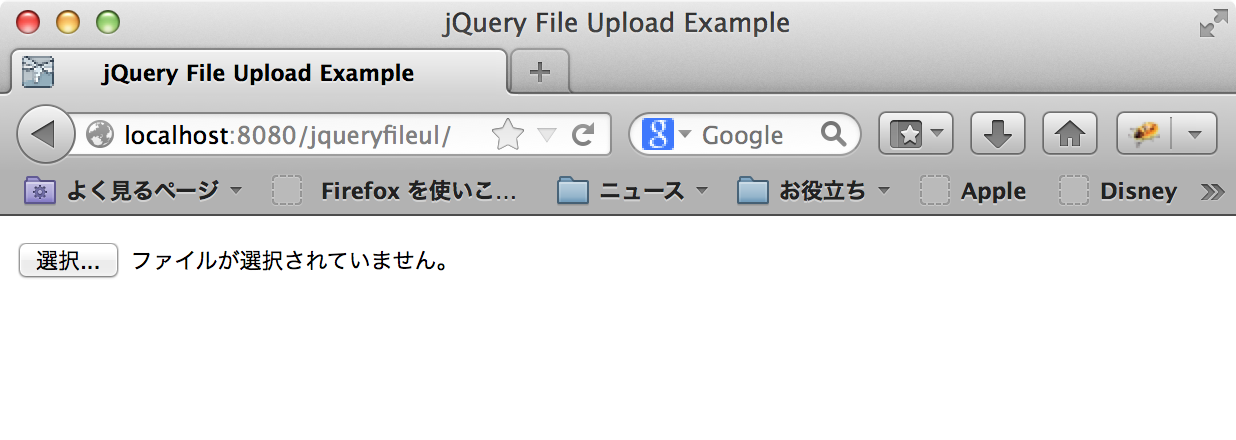
画面はこんな感じ
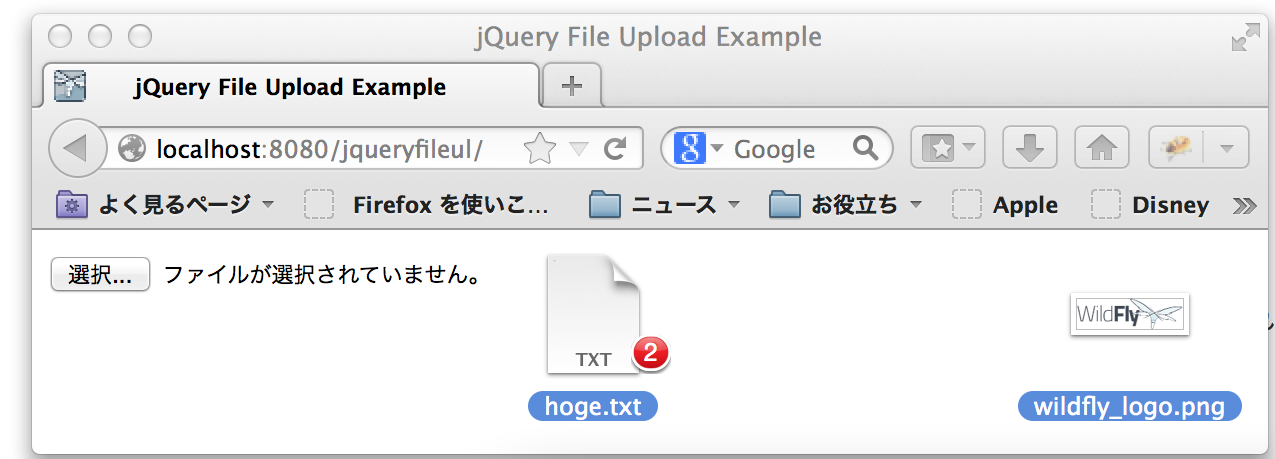
ドラッグアンドドロップ
わかりにくいけどFinderからファイル2個ドラッグしてるところです。
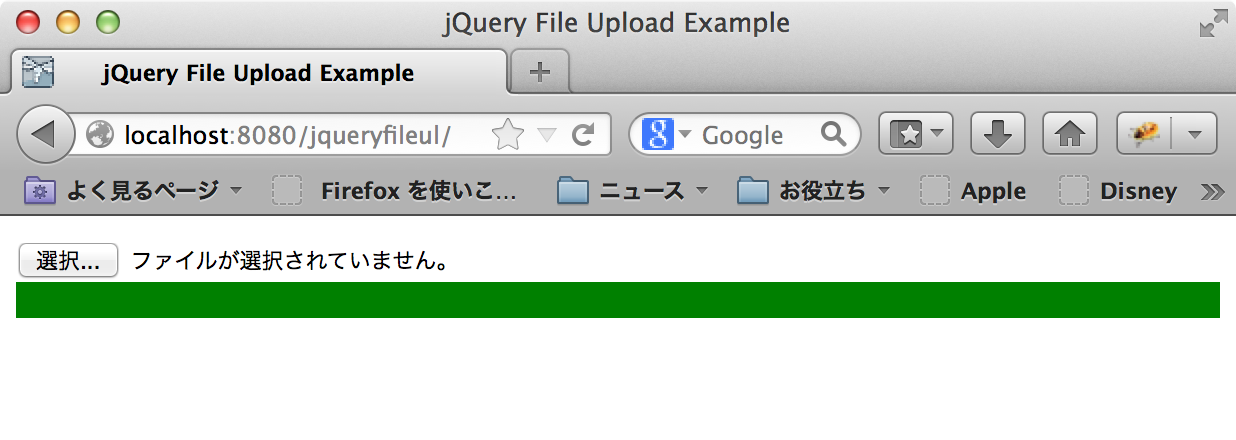
プログレスバーが緑色に
サーバ側でも取れてますね

その他
日本語ファイル名が化ける
私の環境だと何故か日本語ファイル名でアップロードすると文字化けが起こります。この設定しとけば大丈夫だろうと思っていたのだけど。またそのうち調べる。クライアント側でファイル名をURIエンコードしないといけないのかな。
PrimeFacesのファイルアップロードコンポーネントお勧め
JSFの動くWebコンテナがあるならPrimeFacesの同機能[7]を使うのがお勧めです。何故わざわざこんな風に書いているかというと[6]の問題にはまったらしく、advancedモードで動かす事が出来なかったからです。
ちなみにPrimeFacesの同コンポーネントはかつてCommons FileUploadとCommons IOに依存していて、なおかつフィルタの設定も必要だったのですが、JSF2.2上で動かすなら両者とも不要になったようです。WildFlyでは動かなかったけど。GlassFish4なら動くのかな。
参考文献
- jQuery File Upload Demo
- 7 Javascript Ajax File Upload Plugins
- Java Servlet – jQuery File Upload (multiple, drag&drop, progress…) | HMKCode
- Basic plugin · blueimp/jQuery-File-Upload Wiki
- JSF 2.2 で待ちに待ったFileUploadを試す - DENのシステムエンジニアの思うこと
- [WFLY-2329] File upload doesn't work - JBoss Issue Tracker
- PrimeFaces - ShowCase
Tags: web
